Download the
Paisabazaar app Today!
Paisabazaar app Today!
Get instant access to loans, credit cards, and financial tools — all in one place

Win Assured Cashback
Our Advisors are available 7 days a week, 9:30 am - 6:30 pm to assist you with the best offers or help resolve any queries.


Get instant access to loans, credit cards, and financial tools — all in one place

Scan to download on


Our Advisors are available 7 days a week, 9:30 am - 6:30 pm to assist you with the best offers or help resolve any queries.

Check Free Credit Score & Win up to ₹1 lakh


Let’s Get Started
The entered number doesn't seem to be correct

Keeping in view the digitalization drive launched by the government of India, United Bank of India has launched a new service called United ePassbook. This IT-enabled service provides easy access to customer’s passbook and bank account on their smartphone devices just by using an application. The United e-Passbook is compatible in multiple Regional languages support and is very simple and easy to use.
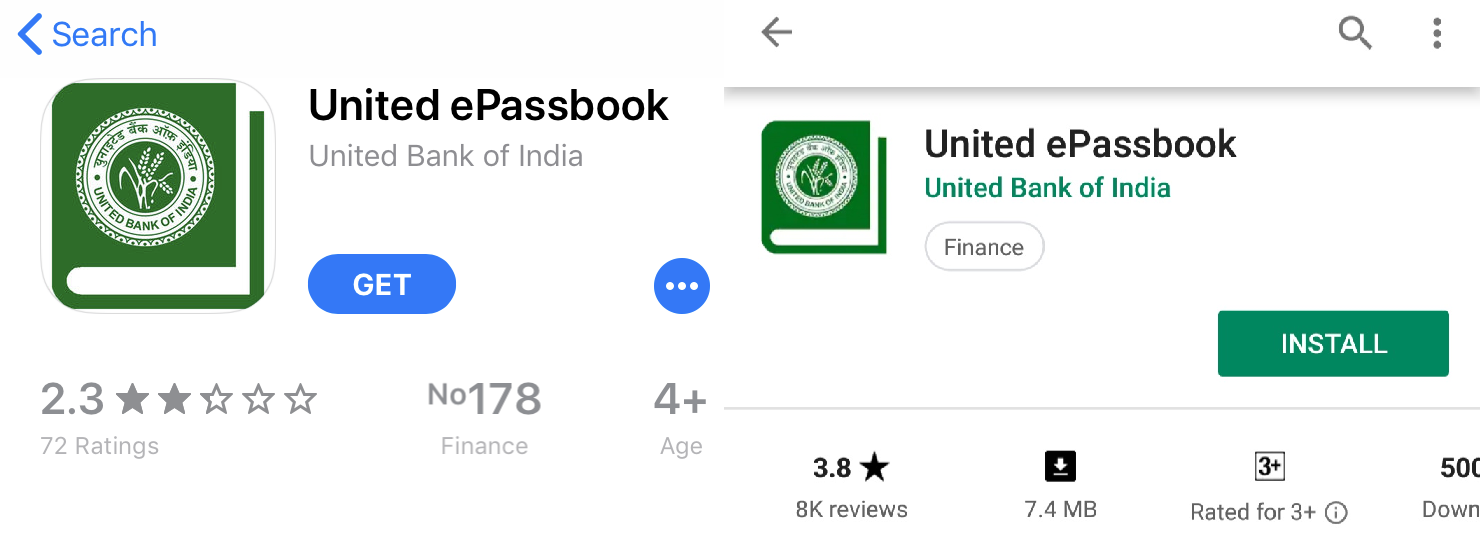
Step 1: Visit Google Play Store & Apple App Store to download the application “United ePassbook”


Step 2: Install the application and click on open
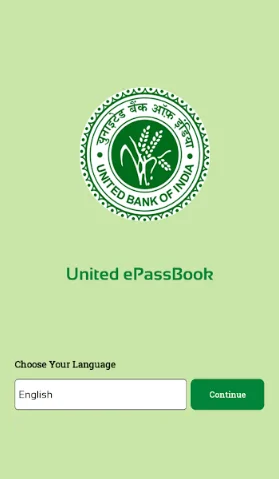
Step 3: Choose your preferred language and go to the next screen.
Step 4: To proceed, click on accept the Terms and Conditions.
Step 5: Enter your Customer ID which is printed on your bank’s physical passbook & provide your registered mobile number and press “Proceed”.
Step 6: You will get an OTP (One Time Password) on your registered mobile no through SMS. The next screen will prompt you for the OTP. In case you do not receive OTP regenerate the same by pressing “Re-Generate”.
Step 7: Enter the OTP in the designated area and press “Submit”.
Step 8: Set a 4-digit m-PIN of your choice and confirm so that your one-time registration exercise is complete. Move to the next screen.
Step 9: Enter the 4 digit m-PIN chosen above to log-in and start using the electronic passbook.

1. Account Information: After logging in to your account using them-Pin, click on “Account Info” to get the details of all your accounts
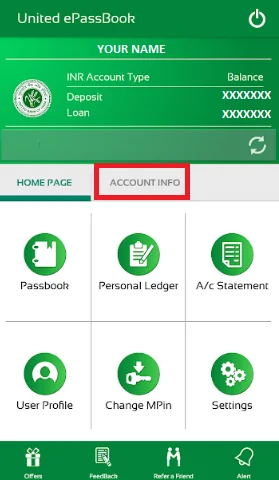
2. Passbook: On the Home Page press “Passbook” option to view passbook.
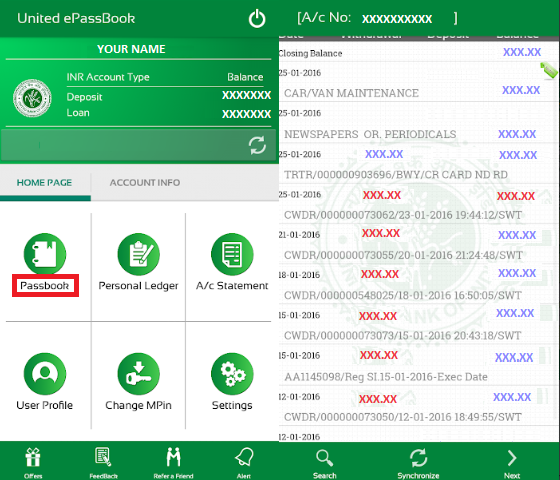
3. Account swapping: To switch between multiple accounts, press “Change Account”
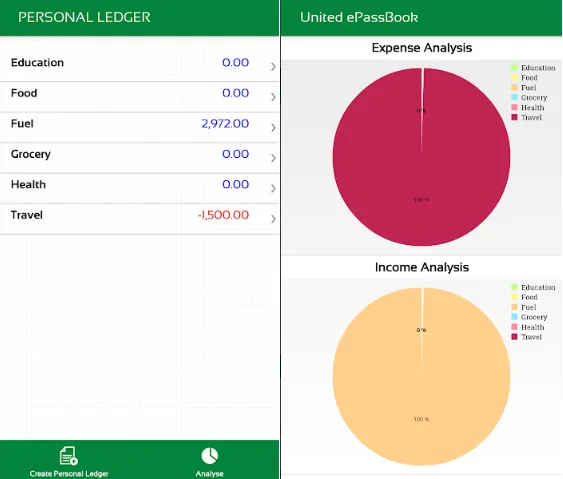
4. Personal Ledger: You can tag individual transactions to your personal ledger using this application. Click and hold your finger on any transaction to access the “Add Notes” option. After entering your notes, tag the notes by pressing “Save” option.
5. Accessing Personal Ledger: Click on the “Personal Ledger” option on “Home Page” to create your own “Personal Ledger” so that you can then analyze monthly expenses.
6. Account Statement: Click on “Account Statement” on the “Home Page” and choose the transaction period for which you need transaction history. Verify your bank registered email address displayed on the screen and click on “Progress”. You will receive account statement to your registered email id shortly.
7. User Profile: Click on “User Profile” On “Home Page” and a screen will appear with following inputs that you can manage: Branch, Customer ID, Name Address, Email ID, Phone Number etc.
8. Change mPIN: To change your confidential mPIN, click on “Change mPIN”. A screen will appear prompting you for the new 4 digit pin. Enter the same and confirm once again to complete the process.
9. Settings: Click on “Settings” button on the “Home Page” to modify the settings like default account number, display order, number of transactions per page and the language
10. Offers: Click on “Offers” on the “Home Page” for getting information on Bank’s latest products, services and offers.
11. Feedback: To provide your valuable feedback or suggestion directly to the Bank, click on “Feedback” On the “Home Page” and provide your inputs to help us improve.
12. Refer a friend: On “Home Page”, click on “Refer a friend” to help your friend connect with us.
13. Alert: On “Home Page”, click on “Alert” to receive alerts and notifications sent by the Bank.
Keeping in view the digitalization drive launched by the government of India, United Bank of India has launched a new service called United ePassbook. This IT-enabled service provides easy access to customer’s passbook and bank account on their smartphone devices just by using an application. The United e-Passbook is compatible in multiple Regional languages support and is very simple and easy to use.
Step 1: Visit Google Play Store & Apple App Store to download the application “United ePassbook”
Step 2: Install the application and click on open
Step 3: Choose your preferred language and go to the next screen.
Step 4: To proceed, click on accept the Terms and Conditions.
Step 5: Enter your Customer ID which is printed on your bank’s physical passbook & provide your registered mobile number and press “Proceed”.
Step 6: You will get an OTP (One Time Password) on your registered mobile no through SMS. The next screen will prompt you for the OTP. In case you do not receive OTP regenerate the same by pressing “Re-Generate”.
Step 7: Enter the OTP in the designated area and press “Submit”.
Step 8: Set a 4-digit m-PIN of your choice and confirm so that your one-time registration exercise is complete. Move to the next screen.
Step 9: Enter the 4 digit m-PIN chosen above to log-in and start using the electronic passbook.
1. Account Information: After logging in to your account using them-Pin, click on “Account Info” to get the details of all your accounts
2. Passbook: On the Home Page press “Passbook” option to view passbook.
3. Account swapping: To switch between multiple accounts, press “Change Account”
4. Personal Ledger: You can tag individual transactions to your personal ledger using this application. Click and hold your finger on any transaction to access the “Add Notes” option. After entering your notes, tag the notes by pressing “Save” option.
5. Accessing Personal Ledger: Click on the “Personal Ledger” option on “Home Page” to create your own “Personal Ledger” so that you can then analyze monthly expenses.
6. Account Statement: Click on “Account Statement” on the “Home Page” and choose the transaction period for which you need transaction history. Verify your bank registered email address displayed on the screen and click on “Progress”. You will receive account statement to your registered email id shortly.
7. User Profile: Click on “User Profile” On “Home Page” and a screen will appear with following inputs that you can manage: Branch, Customer ID, Name Address, Email ID, Phone Number etc.
8. Change mPIN: To change your confidential mPIN, click on “Change mPIN”. A screen will appear prompting you for the new 4 digit pin. Enter the same and confirm once again to complete the process.
9. Settings: Click on “Settings” button on the “Home Page” to modify the settings like default account number, display order, number of transactions per page and the language
10. Offers: Click on “Offers” on the “Home Page” for getting information on Bank’s latest products, services and offers.
11. Feedback: To provide your valuable feedback or suggestion directly to the Bank, click on “Feedback” On the “Home Page” and provide your inputs to help us improve.
12. Refer a friend: On “Home Page”, click on “Refer a friend” to help your friend connect with us.
13. Alert: On “Home Page”, click on “Alert” to receive alerts and notifications sent by the Bank.