Note: The information on this page may not be updated. For latest updates, click here.
The introduction of the GST regime has made it necessary for various eligible individuals or business entities to opt for GST registration in case they provide goods/services. With the new GST system replacing the old VAT and service tax regime, it has become necessary to know its key aspects such as – taxation slab under the GST regime, procedure for registering under GST, documents required for registering for GST, how to check status of GST registration and more.
Table of Contents :
Who needs to register for GST?
The following is a list of individuals and businesses/organisations who are required to complete GST registration:
- People/Businesses liable to deduct TDS or collect TCS
- All taxpayers who make interstate supplies
- People making casual supply of taxable goods or services
- Agents making supplies on behalf of other registered taxpayers
- New owners in case the Proprietor dies or if transfer of business or merger/demerger has occured
- People who pay tax under Reverse Charge Mechanism
- Input Service Distributors
- Suppliers of goods and services with annual aggregated turnover above the threshold limit
- Non-resident taxable suppliers of goods/services
- E-commerce portal operators and suppliers
- UN bodies and embassies
- Other notified bodies, including Government bodies
GST Taxation Limit
32nd GST Council Meeting increased the threshold limit for GST registration. These limits are applicable from 1st April, 2019.
| Category of State | For Sale of Goods | For Providing Services |
| Normal Category States | Annual Turnover of Rs. 40 lakh or more | Annual Turnover of Rs. 20 lakh or more |
| Special Category States | Annual Turnover of Rs. 20 lakh or more | Annual Turnover of Rs. 10 lakh or more |
Note: The special category states under GST include Arunachal Pradesh, Assam, Manipur, Meghalaya, Mizoram, Nagaland, Sikkim, Tripura, Himachal Pradesh, Uttarakhand, Jammu & Kashmir.
List of Documents Required for GST Registration
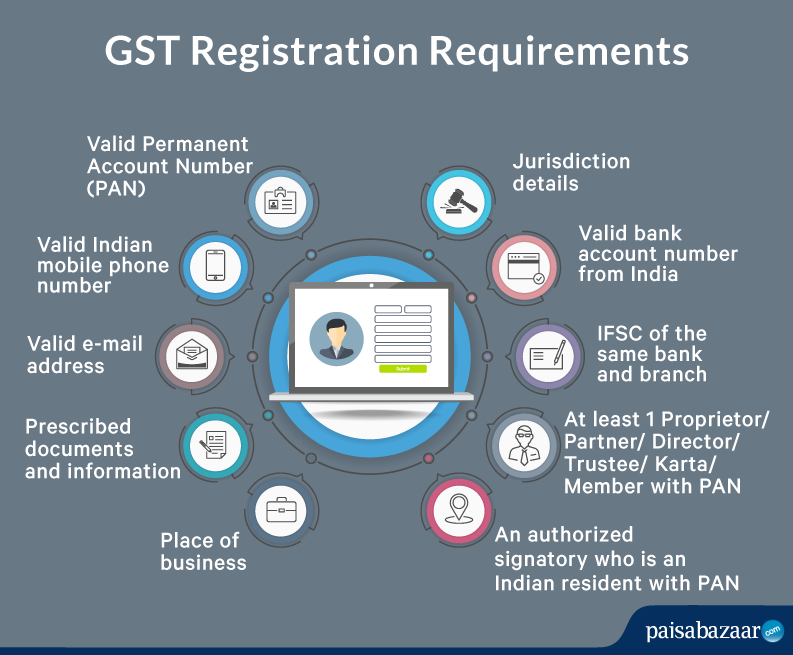
Some of the key documents required for GST Registration include:
- Valid PAN
- Proof of constitution of business/certificate of incorporation
- Proof of primary place of business
- Proof of appointment of authorized signatory
- Photograph of stakeholder/authorized signatory (promoter/partner)
In addition to the above documents, different entities are required to submit some specific documents. You can find the list of the entity-specific documents here.
Step-by-Step Procedure of GST Registration for Normal Taxpayers
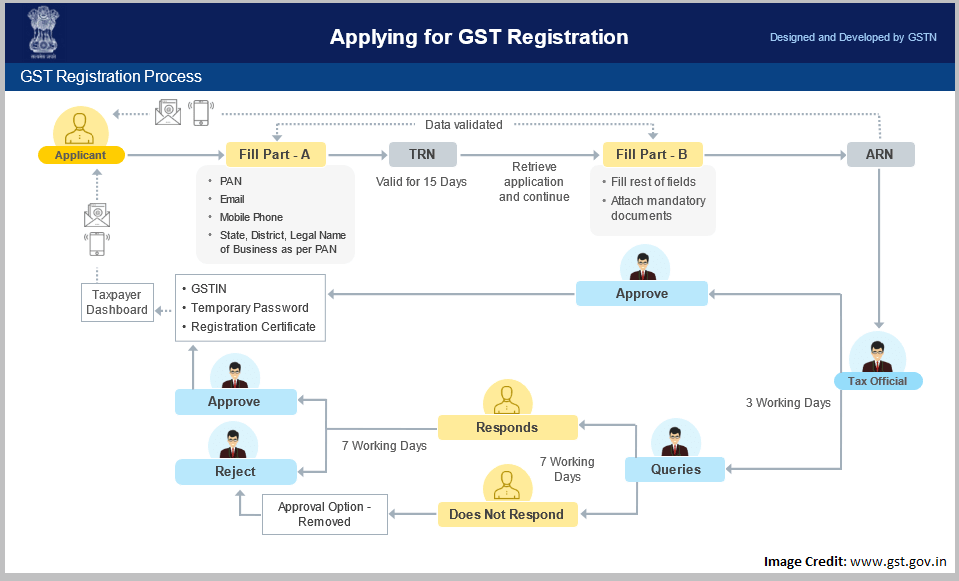
The GST Registration process is a simple 2-stage process. The registration form comprises 2 parts – A and B:
Part A of the GST registration form includes basic information of the applicant and helps generate Temporary Reference Number (TRN), which is valid for 15 days. This TRN can be then used to fill out Part B of the form.
Successful submission of GST registration form Part B generates an Application Reference Number (ARN). Subsequently, a tax official validates the GST Registration application. Once approved, GST Number and GST Registration Certificate are issued.
 Step 1: Visit the GST Government website.
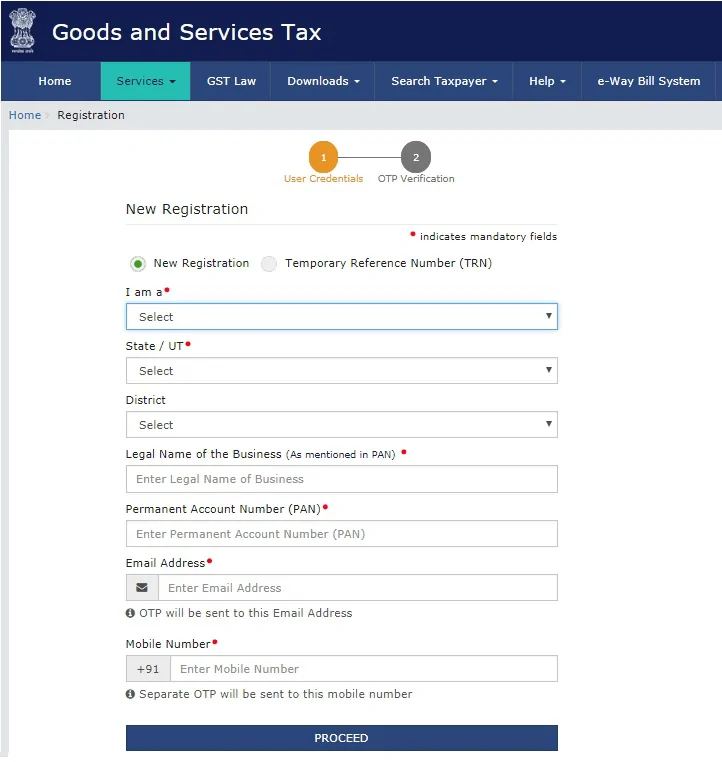
Step 2: Click Services > Registration > New Registration option.

Step 3: The following application form for registration under GST will be displayed. It is divided into two parts, Part A and Part B. The following “New Registration” page is displayed in Part A. Fill out the details in Part A of the form and click on “Proceed”.
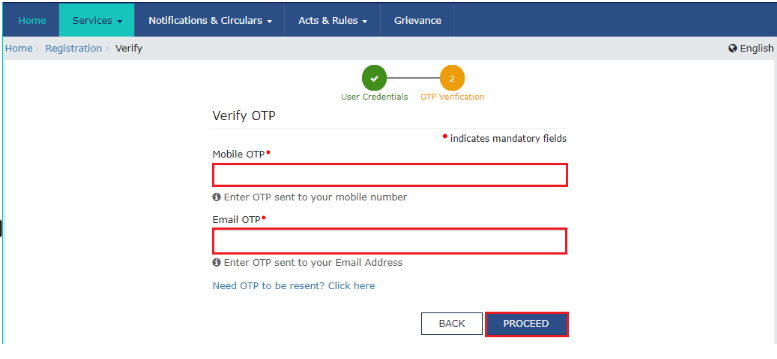
 Step 4: On the subsequent OTP Verification page, enter the OTP you received on your mobile number and that on your email address. Please note that this OTP is valid only for only 10 minutes.
 Step 5: Once you verify the application, Part A of the GST registration form is completed. Subsequently the system automatically generates and displays a Temporary Reference Number (TRN). This TRN which is required for completion of registration under GST is valid for only 15 days.
Note: You will receive the TRN acknowledgment information on your e-mail address as well as on your mobile number.
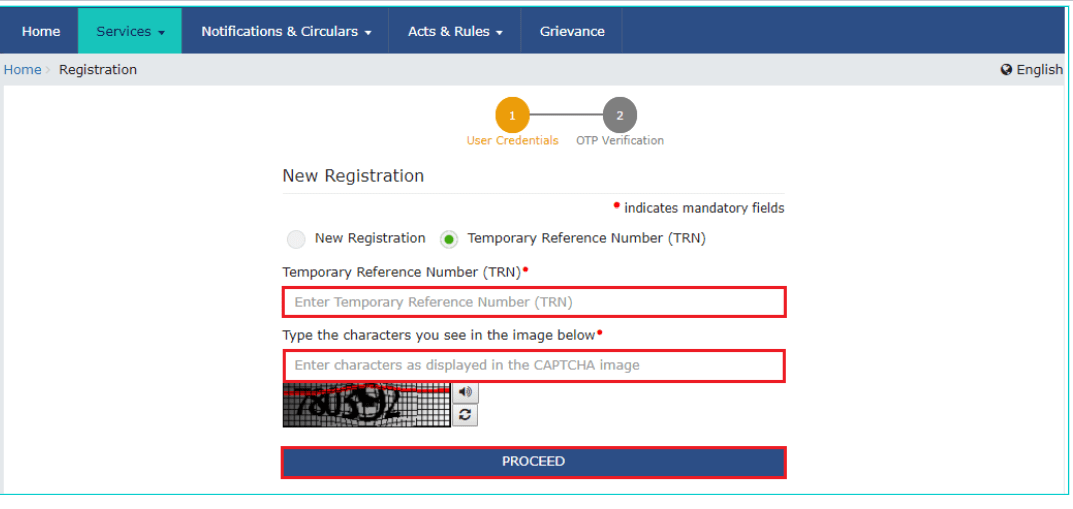
 Step 6: Fill out Part B of the form. You can open Part B of the GST registration form by clicking on the “My Saved Applications” tab. Enter the TRN generated and the captcha text as shown on the screen below.
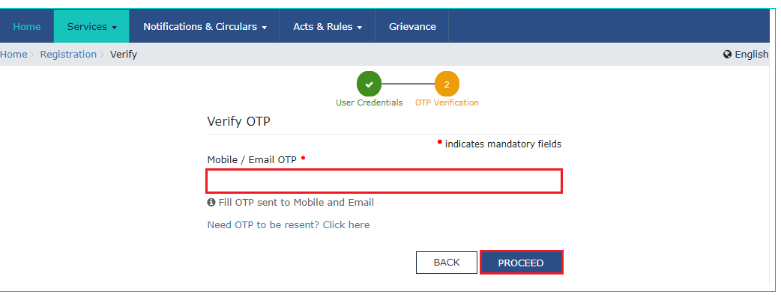
 Step 7: Once you click “Proceed”, the following verification page will be displayed. Enter the OTP received on your registered mobile number and e-mail id.
 Step 8: Subsequently, the My Saved Applications page is displayed. Under the Action column, click the Edit icon as shown below.
Note: The status of the application for registering under GST is ‘Draft’ by default unless the application is submitted. Once the application is submitted, the status is changed to ‘Pending for Validation’.
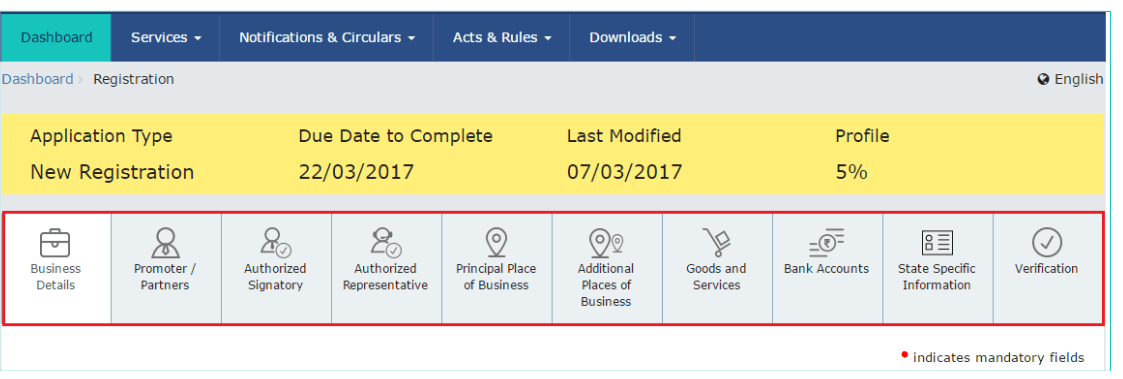
 Step 9: On the subsequent screen, the GST registration application form with the following tabs will be displayed. You need to select each tab and enter the relevant details. The following are the key tabs in the application form for GST registration:
- Business Details
- Promoter/Partners
- Authorized Signatory
- Authorized Representative
- Principal Place of Business
- Goods and Services
- Bank Accounts
- State Specific Information
- Verification
Step 10: After successful verification of your GST application for registration, you will receive an acknowledgement within 15 minutes on your registered e-mail address and mobile phone number. Moreover, an Application Reference Number (ARN) receipt is sent on your e-mail address and mobile phone number.

How to check GST Registration Status?
Step 1: Visit the GST Login portal.
Step 2: Click Services > Registration > Track Application Status link as shown below.
 Step 3: Select the ARN button and enter the ARN received on your e-mail address after you submitted the registration application under GST. Type the captcha and click on “Search” to view the GST registration application status.
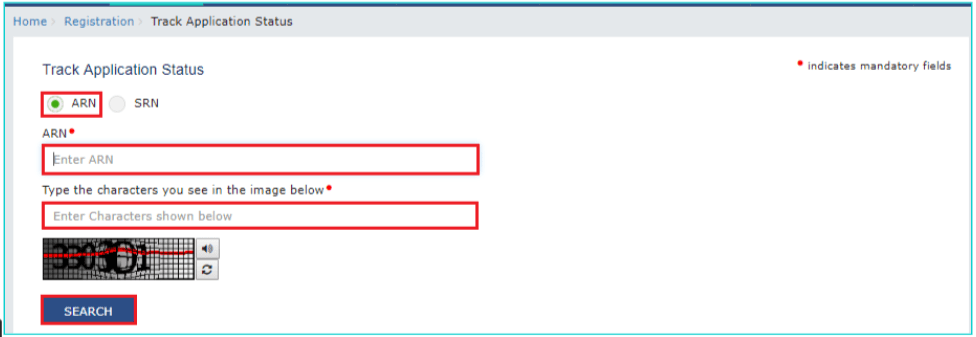 Subsequently, one of following GST registration status will be displayed:
- Provisional: Provisional GST ID issued but registration not yet completed.
- Pending for Verification: Application for registering under GST submitted, but not yet approved.
- Validation Against Error: PAN details provided do not match the IT Department PAN records.
- Migrated: GST migration completed successfully.
- Cancelled: GST registration cancelled.
Penalties for GST Registration Failure
- Those who fail to register under GST even though required to mandatorily do so will have to pay a penalty equal to 10% of the tax amount or Rs. 10,000, whichever is more.
- If failure to register under GST is deemed to be an attempt at deliberate fraud, the penalty applicable can be as high as 100% of the tax due.
How to get GST Registration Certificate?
GST registered taxpayers can download their GST Registration Certificate by following the steps discussed below. It should be noted that the GST Certificate has to be downloaded from the online GST Portal and no physical certificate is issued by the government.
Step 1: Visit and login the GST portal.
Step 2: Click on Services>User Services>View/Download Certificates.
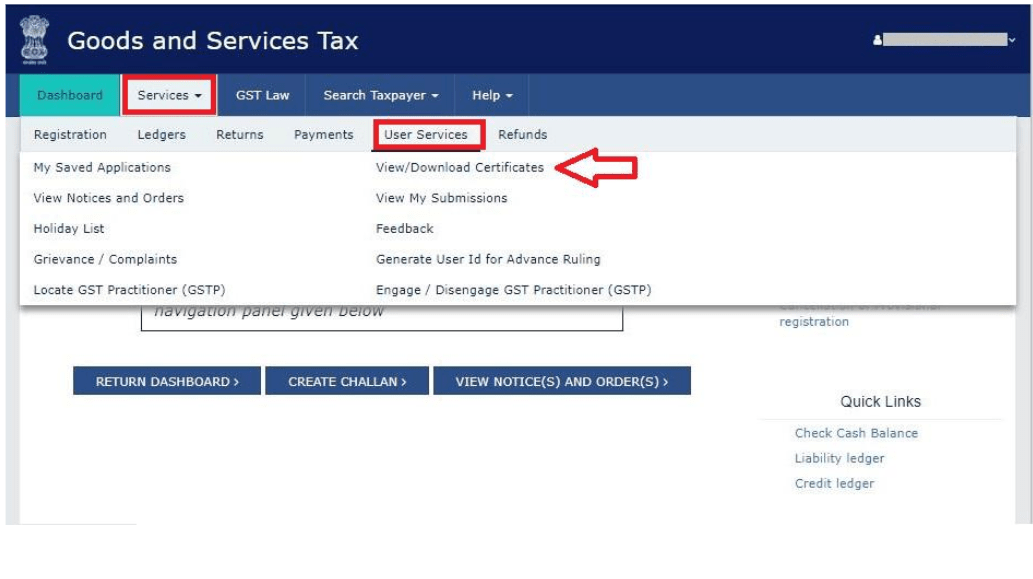
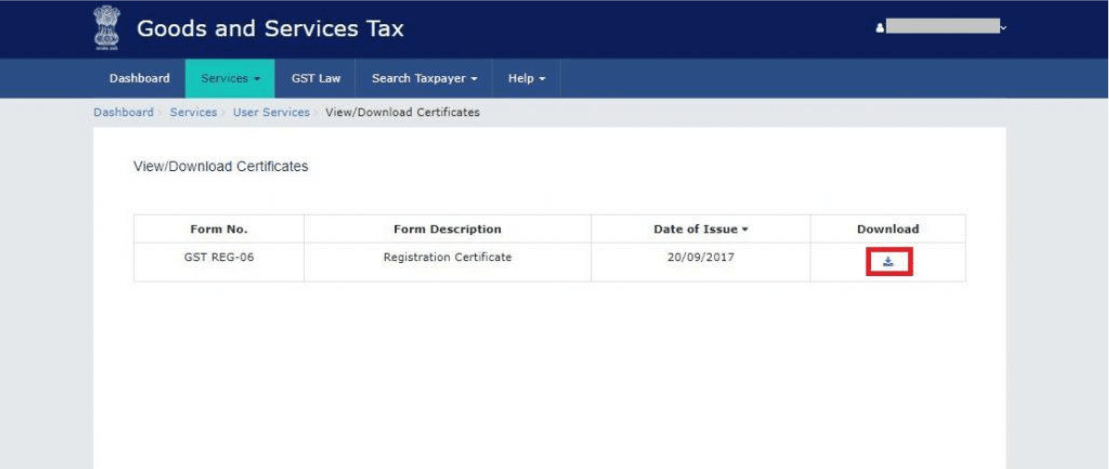
Step 3: You will see Form REG-06 for GST Registration Certificate. Download the certificate by clicking on the download sign.
 The GST Registration Certificate includes the GST Number (GSTIN) and key details of the registered business name, address, and date of registration of the business are displayed.
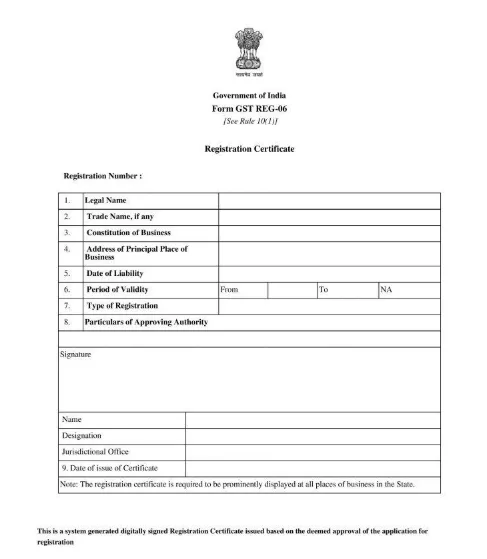 The second page shows the details of any additional places of business that you have mentioned.
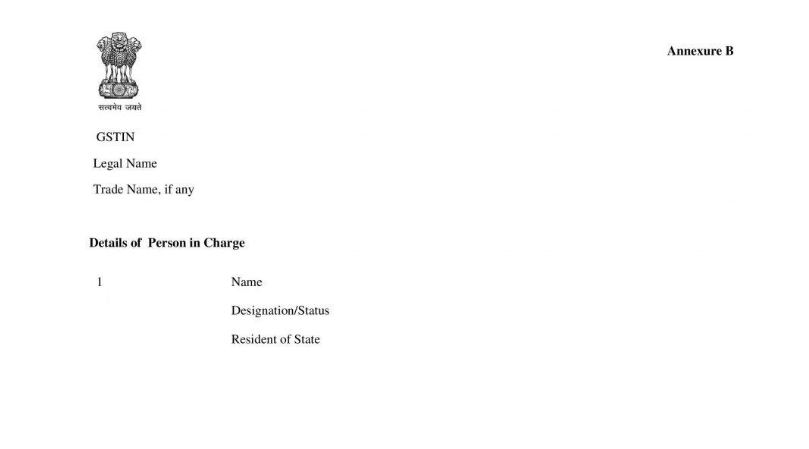
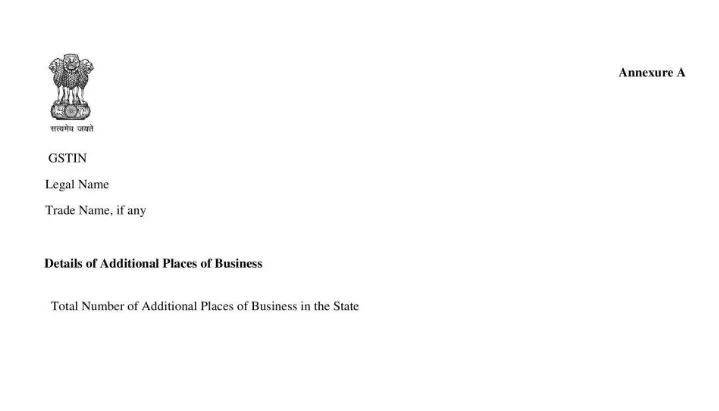 The third page shows details of the person in charge of the business.
